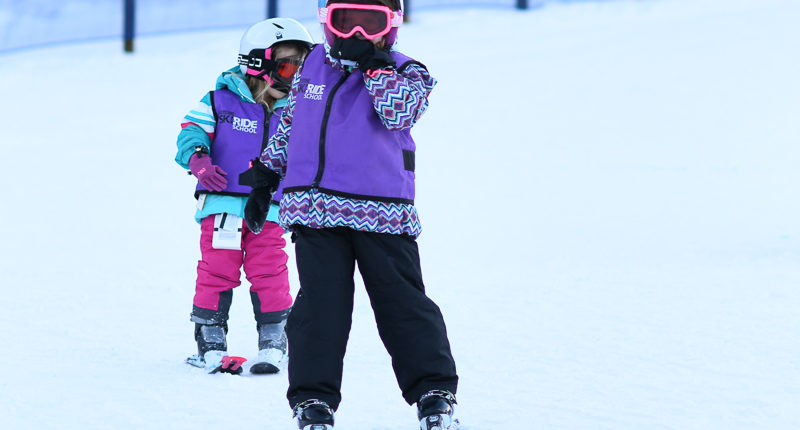
So, you’ve read Am I Ready to Teach My Kids to Ski? and decided to try to teach them anyway? Let me tell you from experience, you’ve started on a deeply rewarding and absolutely worthwhile endeavor. There is nothing better (in my mind) than watching your own child conquer the many steps involved on the way to becoming an expert skier.
The last thing you want after loading the kids up, driving to the ski hill, and purchasing lift tickets is to have to end your day early because your toddler is cold or uncomfortable. The proper gear makes all the difference. I know first-hand, buying all this stuff is expensive, but if you buy your gear right, you should be able to resell it next year without facing a huge loss.
Clothing
- Winter ski coat and pants – I recommend looking at Obermeyer and Spyder as they make some of the best outerwear for kids. Their coats are well-insulated, waterproofed, have expandable sleeves and include ski-specific features like snow-skirts and lift-pass pockets. Winter coats and pants are sized similar to other toddler clothing (ie: A size 2 should fit a two-year-old.)
- Gloves or mittens – Toddler’s hands are small and this makes finding properly fitting gloves or mittens extremely difficult We had a lot of problems with gloves sliding off our toddler’s hands. My best recommendation is to try on a lot of different pairs. Try your best to get your kids to wear mittens instead of gloves as they are easier to get on/off and also warmer. Unfortunately, our kids refused to wear them until they turned four.
- Neck gator/facemask – You want to find one that fits tightly and isn’t overly cumbersome (or slides over their eyes.)
Ski Gear
- Skis – When buying skis, the most important thing to get right is the length. But typical adult rules of thumb regarding ski sizing doesn’t apply to toddlers. You want your toddler’s skis to be at their chest level instead. Two and Three-year-olds should be using 68-70cm skis (the smallest size made.) I like Rossignol and K2 because their skis are generally a little wider underfoot than other brands (which seemed to help our own kid’s balance better) and also feature early rise tips which make the skis easier to pivot.
- Boots – Take a tape measure and measure out your toddler’s feet in centimeters. That will directly translate to their ski boot size in Mondopoint. The smallest boot size made is 14.5. If your child’s feet are still too small, I recommend using one pair of thicker socks. Tip: I have noticed that some manufacturers cheat a little on boot size (ie: both their 14.5 and 15.5 boots are actually identical.)
- Helmet – Teach the importance of a helmet from the very beginning. Our kids always had big noggins, so we never had a problem with fit. You want to make
Training Tools
Let’s be real, the actual task of teaching your child to ski is by not always easy. Don’t plan on just slapping on a pair of skis to your kid’s feet and pushing ’em down the hill. Lack of planning and preparation will lead to a less-than-stellar day for everyone. Teaching a child to ski is a tough job and is both mentally and physically draining. At the end of the day, you will likely be coming home more tired than your kid (and also with a sore back.) So pick up these tools first (they’re not that expensive) and try make the whole process just a little less frustrating for both your child…and yourself.
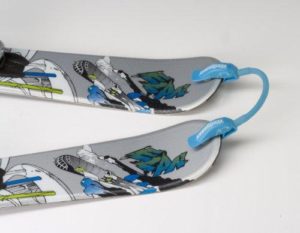
Tip connectors – These are probably the most common tool out there for teaching children to ski and most professional ski instructors will use one at some point in their instruction. The device consists of two clamps and a bungee cord that connect the tips of your toddler’s skis and help them to form a wedge (snowplow). Making a snowplow is the first step young skiers need to master in order to control their speed and begin forming turns. A variety of companies sell them and they only cost around $15. Some of the more popular models include the Wedgease and Edgie Wedgie. My wife purchased the Wedgease which has a quick-clamp instead of the more-common turn-screw design. The clamp makes it easier to get on and off. Toddlers in the 2-3 year-old range don’t always have the leg strength required to maintain a wedge shape on their own and the clamps just make it easier to hold the shape. Older kids may also benefit from tip connectors because it teaches the wedge shape instantly and also helps prevent them from crossing their skis. As great as they are, you should remove them once your child starts getting the hang of things so they don’t become dependent on them. Once the connectors are gone, your child will find it much easier to shuffle-their-feet to maneuver through the lift line.
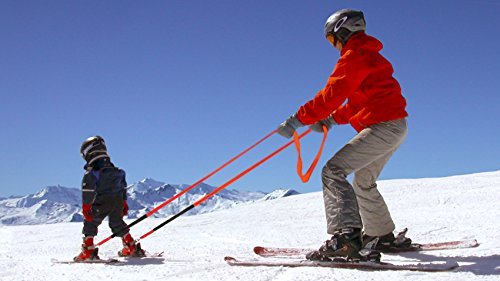
Ski Harness – I have to admit, I grew up hating these things. I’d watch from the chairlift as some poor toddler—with parent in tow—would ski beneath me. All-of-a-sudden, the parent (thinking they’re going to fast) yanks on the leash like their child is a misbehaving puppy. After seeing this happen, time-after-time, I began to feel harnesses were an unnecessarily cruel form of child abusive. So when my wife happened to purchase sets for our kid’s first ski day, I flat out refused to use them. Only after seeing the success my wife was having (she’s not an expert skier) with our son did give them a second chance. If used correctly, a ski harness can actually be quite helpful.
The ski harness (or ski trainer) will consist of two things: a harness and a leash. Your child wears the harness around their chest and shoulder. Hopefully, the harness will be brightly colored and integrate a handle in the back to comfortably lift your toddler in the case that they fall or need a boost getting on the chairlift. Eventually, your child will need to learn to do both of these things on their own, but I don’t see the harm in a little help now and then (especially if it helps avoids a tantrum.)
The leash is the more visible second-half to the ski trainer kit. My favorite is the CoPilot Ski Trainer manufactured by Snowcraft. Another completely different option is the Launch Pad Hookease.
